간만에 오래전에 적다가 말았던 영화 스트리밍 서버 만드는 글을 이어간다.
라즈베리파이 1~2에서 토렌트를 사용하니, 로컬에 저장을 할 때도, NAS용 디스크를 만들어서 사용할 때도, 디스크 I/O가 발생하면 라즈베리파이가 거의 먹통이 되는 수준이었다.
최근의 라즈베리파이3, 4는 그정도는 아니었지만, 시간이 지난 현재는 라즈베리파이가 아닌, Jetson Nano를 서버로 사용하고 있다. 젯슨나노는 디스크I/O가 있어도 시스템이 멈추는 수준으로까지는 되지 않아서 나은듯. 10만원짜리 홈서버로 사용하기에는 괜찮은 듯하다.
트랜즈미션을 이용하여, 다운로드 받은 영상을 스트리밍으로 Play하기 위한 미디어서버를 설치한다.
PLEX를 사용하였다. Plex Server는 성능 낮은 서버에서 미디어센터를 구축하기 위한 괜찮은 솔루션으로 보인다. 설치도 쉽고 사용해보니 편의성도 좋다. 아래에 설치 방법을 정리한다.
설치를 하기 위해, 현재의 시스템을 업데이트할 것들을 먼저하자.
$ sudo apt-get update
$ sudo apt-get upgrade
도커 Plex Repository를 설정한다.
$ sudo apt-get install apt-transport-https

Reading package lists... Done
Building dependency tree
Reading state information... Done
The following packages were automatically installed and are no longer required:
  apt-clone archdetect-deb bogl-bterm busybox-static cryptsetup-bin
  dpkg-repack efibootmgr gir1.2-geocodeglib-1.0 gir1.2-timezonemap-1.0
  gir1.2-xkl-1.0 grub-common gyp kde-window-manager kpackagetool5
  kwayland-data kwin-common kwin-data kwin-x11 libdebian-installer4 libfwup1
  libjs-async libjs-inherits libjs-node-uuid libkdecorations2-5v5
  libkdecorations2private5v5 libkf5activities5 libkf5declarative-data
  libkf5declarative5 libkf5globalaccelprivate5 libkf5idletime5
  libkf5kcmutils-data libkf5kcmutils5 libkf5package-data libkf5package5
  libkf5plasma5 libkf5quickaddons5 libkf5waylandclient5 libkf5waylandserver5
  libkscreenlocker5 libkwin4-effect-builtins1 libkwineffects11
  libkwinglutils11 libkwinxrenderutils11 libllvm8 libqt5quickwidgets5
  libuv1-dev libxcb-composite0 libxcb-cursor0 libxcb-damage0 node-abbrev
  node-ansi node-ansi-color-table node-archy node-async node-balanced-match
  node-block-stream node-brace-expansion node-combined-stream node-concat-map
  node-cookie-jar node-delayed-stream node-forever-agent node-form-data
  node-fs.realpath node-fstream node-fstream-ignore node-github-url-from-git
  node-glob node-graceful-fs node-hosted-git-info node-inflight node-inherits
  node-ini node-isexe node-json-stringify-safe node-lockfile node-lru-cache
  node-mime node-minimatch node-mkdirp node-mute-stream node-node-uuid
  node-nopt node-npmlog node-once node-osenv node-path-is-absolute
  node-pseudomap node-qs node-read node-request node-retry node-rimraf
  node-semver node-sha node-slide node-spdx-correct node-spdx-expression-parse
  node-spdx-license-ids node-tar node-tunnel-agent node-underscore
  node-validate-npm-package-license node-which node-wrappy node-yallist
  os-prober python3-dbus.mainloop.pyqt5 python3-icu python3-pam python3-pyqt5
  python3-pyqt5.qtsvg python3-pyqt5.qtwebkit
  qml-module-org-kde-kquickcontrolsaddons qml-module-qtmultimedia
  qml-module-qtquick2 rdate tasksel tasksel-data
Use 'sudo apt autoremove' to remove them.
The following NEW packages will be installed:
  apt-transport-https
0 upgraded, 1 newly installed, 0 to remove and 202 not upgraded.
Need to get 1,692 B of archives.
After this operation, 153 kB of additional disk space will be used.
Get:1 http://ports.ubuntu.com/ubuntu-ports bionic-updates/universe arm64 apt-transport-https all 1.6.12ubuntu0.1 [1,692 B]
Fetched 1,692 B in 1s (1,750 B/s)
debconf: delaying package configuration, since apt-utils is not installed
Selecting previously unselected package apt-transport-https.
(Reading database ... 235359 files and directories currently installed.)
Preparing to unpack .../apt-transport-https_1.6.12ubuntu0.1_all.deb ...
Unpacking apt-transport-https (1.6.12ubuntu0.1) ...
Setting up apt-transport-https (1.6.12ubuntu0.1) ...
$ curl https://downloads.plex.tv/plex-keys/PlexSign.key | sudo apt-key add -


  % Total    % Received % Xferd  Average Speed   Time    Time     Time  Current
                                 Dload  Upload   Total   Spent    Left  Speed
100  3072  100  3072    0     0  26713      0 --:--:-- --:--:-- --:--:-- 26947
OK
$ echo deb https://downloads.plex.tv/repo/deb public main | sudo tee /etc/apt/sources.list.d/plexmediaserver.list

deb https://downloads.plex.tv/repo/deb public main
패키지 Repository를 업데이트한 후에, PLEX를 설치한다.
$ sudo apt-get update

Get:1 file:/var/cuda-repo-10-0-local-10.0.326  InRelease
Ign:1 file:/var/cuda-repo-10-0-local-10.0.326  InRelease
Get:2 file:/var/visionworks-repo  InRelease
Ign:2 file:/var/visionworks-repo  InRelease
Get:3 file:/var/visionworks-sfm-repo  InRelease
Ign:3 file:/var/visionworks-sfm-repo  InRelease
Get:4 file:/var/visionworks-tracking-repo  InRelease
Ign:4 file:/var/visionworks-tracking-repo  InRelease
Get:5 file:/var/cuda-repo-10-0-local-10.0.326  Release [574 B]
Get:6 file:/var/visionworks-repo  Release [1,999 B]
Get:7 file:/var/visionworks-sfm-repo  Release [2,003 B]
Get:8 file:/var/visionworks-tracking-repo  Release [2,008 B]
Get:5 file:/var/cuda-repo-10-0-local-10.0.326  Release [574 B]
Get:6 file:/var/visionworks-repo  Release [1,999 B]
Get:7 file:/var/visionworks-sfm-repo  Release [2,003 B]
Get:8 file:/var/visionworks-tracking-repo  Release [2,008 B]
Hit:9 https://repo.download.nvidia.com/jetson/common r32 InRelease
Get:10 https://downloads.plex.tv/repo/deb public InRelease [6,685 B]
Hit:11 https://repo.download.nvidia.com/jetson/t210 r32 InRelease
Hit:13 http://packages.ros.org/ros/ubuntu bionic InRelease
Hit:15 http://ports.ubuntu.com/ubuntu-ports bionic InRelease
Hit:17 http://ports.ubuntu.com/ubuntu-ports bionic-updates InRelease
Hit:19 http://ports.ubuntu.com/ubuntu-ports bionic-backports InRelease
Hit:20 http://ports.ubuntu.com/ubuntu-ports bionic-security InRelease
Get:21 https://downloads.plex.tv/repo/deb public/main arm64 Packages [1,180 B]
Fetched 7,865 B in 3s (2,778 B/s)
Reading package lists... Done
이제 PLEX Media Server를 설치한다.
$ sudo apt-get install plexmediaserver

Reading package lists... Done
Building dependency tree
Reading state information... Done
The following packages were automatically installed and are no longer required:
  apt-clone archdetect-deb bogl-bterm busybox-static cryptsetup-bin
  dpkg-repack efibootmgr gir1.2-geocodeglib-1.0 gir1.2-timezonemap-1.0
  gir1.2-xkl-1.0 grub-common gyp kde-window-manager kpackagetool5
  kwayland-data kwin-common kwin-data kwin-x11 libdebian-installer4 libfwup1
  libjs-async libjs-inherits libjs-node-uuid libkdecorations2-5v5
  libkdecorations2private5v5 libkf5activities5 libkf5declarative-data
  libkf5declarative5 libkf5globalaccelprivate5 libkf5idletime5
  libkf5kcmutils-data libkf5kcmutils5 libkf5package-data libkf5package5
  libkf5plasma5 libkf5quickaddons5 libkf5waylandclient5 libkf5waylandserver5
  libkscreenlocker5 libkwin4-effect-builtins1 libkwineffects11
  libkwinglutils11 libkwinxrenderutils11 libllvm8 libqt5quickwidgets5
  libuv1-dev libxcb-composite0 libxcb-cursor0 libxcb-damage0 node-abbrev
  node-ansi node-ansi-color-table node-archy node-async node-balanced-match
  node-block-stream node-brace-expansion node-combined-stream node-concat-map
  node-cookie-jar node-delayed-stream node-forever-agent node-form-data
  node-fs.realpath node-fstream node-fstream-ignore node-github-url-from-git
  node-glob node-graceful-fs node-hosted-git-info node-inflight node-inherits
  node-ini node-isexe node-json-stringify-safe node-lockfile node-lru-cache
  node-mime node-minimatch node-mkdirp node-mute-stream node-node-uuid
  node-nopt node-npmlog node-once node-osenv node-path-is-absolute
  node-pseudomap node-qs node-read node-request node-retry node-rimraf
  node-semver node-sha node-slide node-spdx-correct node-spdx-expression-parse
  node-spdx-license-ids node-tar node-tunnel-agent node-underscore
  node-validate-npm-package-license node-which node-wrappy node-yallist
  os-prober python3-dbus.mainloop.pyqt5 python3-icu python3-pam python3-pyqt5
  python3-pyqt5.qtsvg python3-pyqt5.qtwebkit
  qml-module-org-kde-kquickcontrolsaddons qml-module-qtmultimedia
  qml-module-qtquick2 rdate tasksel tasksel-data
Use 'sudo apt autoremove' to remove them.
The following NEW packages will be installed:
  plexmediaserver
0 upgraded, 1 newly installed, 0 to remove and 202 not upgraded.
Need to get 70.6 MB of archives.
After this operation, 191 MB of additional disk space will be used.
Get:1 https://downloads.plex.tv/repo/deb public/main arm64 plexmediaserver arm64 1.20.1.3252-a78fef9a9 [70.6 MB]
Fetched 70.6 MB in 8s (9,139 kB/s)
debconf: delaying package configuration, since apt-utils is not installed
Selecting previously unselected package plexmediaserver.
(Reading database ... 235363 files and directories currently installed.)
Preparing to unpack .../plexmediaserver_1.20.1.3252-a78fef9a9_arm64.deb ...
PlexMediaServer install: Pre-installation Validation.
PlexMediaServer install: Pre-installation Validation complete.
Unpacking plexmediaserver (1.20.1.3252-a78fef9a9) ...
Setting up plexmediaserver (1.20.1.3252-a78fef9a9) ...

Configuration file '/etc/apt/sources.list.d/plexmediaserver.list'
 ==> File on system created by you or by a script.
 ==> File also in package provided by package maintainer.
   What would you like to do about it ?  Your options are:
    Y or I  : install the package maintainer's version
    N or O  : keep your currently-installed version
      D     : show the differences between the versions
      Z     : start a shell to examine the situation
 The default action is to keep your current version.
*** plexmediaserver.list (Y/I/N/O/D/Z) [default=N] ? Y
Installing new version of config file /etc/apt/sources.list.d/plexmediaserver.list ...
PlexMediaServer install: PlexMediaServer-1.20.1.3252-a78fef9a9 - Installation starting.
PlexMediaServer install:
PlexMediaServer install: Now installing based on:
PlexMediaServer install:   Installation Type:   New
PlexMediaServer install:   Process Control:     systemd
PlexMediaServer install:   Plex User:           plex
PlexMediaServer install:   Plex Group:          plex
PlexMediaServer install:   Video Group:         video
PlexMediaServer install:   Metadata Dir:        /var/lib/plexmediaserver/Library/Application Support
PlexMediaServer install:   Temp Directory:      /tmp
PlexMediaServer install:   Lang Encoding:       en_US.UTF-8
PlexMediaServer install:   Transcoding HW:      Not found
PlexMediaServer install:
PlexMediaServer install: Completing final configuration.
Created symlink /etc/systemd/system/multi-user.target.wants/plexmediaserver.service → /lib/systemd/system/plexmediaserver.service.
PlexMediaServer install: PlexMediaServer-1.20.1.3252-a78fef9a9 - Installation successful.  Errors: 0, Warnings: 0
Processing triggers for desktop-file-utils (0.23-1ubuntu3.18.04.2) ...
Processing triggers for bamfdaemon (0.5.3+18.04.20180207.2-0ubuntu1) ...
Rebuilding /usr/share/applications/bamf-2.index...
Processing triggers for gnome-menus (3.13.3-11ubuntu1.1) ...
Processing triggers for mime-support (3.60ubuntu1) ...
위의 설치 작업 중에 아래의 선택을 하도록 하는데, "Y"를 눌러서 설치를 계속한다. (관리용)
   What would you like to do about it ?  Your options are:
    Y or I  : install the package maintainer's version
    N or O  : keep your currently-installed version
      D     : show the differences between the versions
      Z     : start a shell to examine the situation
 The default action is to keep your current version.
*** plexmediaserver.list (Y/I/N/O/D/Z) [default=N] ? Y
설치는 끝났고, Plex서버를 설정해보자.
설정 파일은 설치 완료된 메시지 마지막에서 7째 줄에 표시된 파일에 있다. 버전별로 이 설정 파일의 위치가 다르게 나타나는데, 제일 쉽게, 위의 로그에 표시되어있으니, 그 파일을 수정하면 된다.
Created symlink /etc/systemd/system/multi-user.target.wants/plexmediaserver.service → /lib/systemd/system/plexmediaserver.service.
위의 심볼릭 링크된 파일(/etc/systemd/system/multi-user.target.wants/plexmediaserver.service) 또는 실제 파일( /lib/systemd/system/plexmediaserver.service) 둘중에서 어느것을 수정해도 좋다.
vi 또는 편집기를 이용하여, User 와 Group에 설정된 Plex를 라즈베리파이에서 사용되는 계정으로 변경한다. 라즈베리파이의 경우, default 로 PI계정을 사용하고 있어서, 이것을 pi로 맞추도록 하였다. 토렌트로 저장된 동영상화일을 읽어야 하기에 동일 계정으로 접근하도록 하였다.
User = pi
Group = pi
설정 변경을 완료하였으면, PLEX 서비스를 재기동한다.
$ sudo service plexmediaserver restart실행을 했는데, 아래의 명령을 실행하라는 안내가 나온다면, 그대로 따라서 실행하면 된다.
....    Run 'systemctl daemon-reload'  to reload.....

$ sudo systemctl daemon-reload
이제 설치가 끝났다. 웹 관리자 화면에서 설정을 해보자. IE로 접속을 하니, 정상 작동이 안되어서 크롬으로 접속하였다. 접속 주소는 라즈베리파이 서버의 32400 포트로 접속하면 된다. http://192.168.0.4:32400/web/index.html 로 접속을 한다.
접속 설정 화면은 한번 설정을 한 터라, 화면 캡쳐를 받아두지 않아서 글로 설명한다.
휴대폰에서 구글 플레이에서 PLEX앱을 다운받아 설치한다. 실행된 앱에서 구글계정으로 로그인하였다. 다른 것으로 해도 된다.
조금전에 접속한 PLEX 서버(http://192.168.0.4:32400/web)에서 로그인을 폰에서 입력한 것도 동일한 계정으로 로그인을 한 후에, 로컬서버를 외부에서 사용하도록 설정한다. 설정하는 폴더를 난, 영화로 정하고 영화가 저장되는 폴더는 토렌트파일이 저장되는 폴더와 연결을 하였다.
설정 중에 프리미엄 이다. 뭐다 해서 요금 지불하는 내용이 나오는데, 그것을 무시하고 나중에 하겠다는 것으로 지나쳐도 된다. 다음은 로그인된 화면이다.
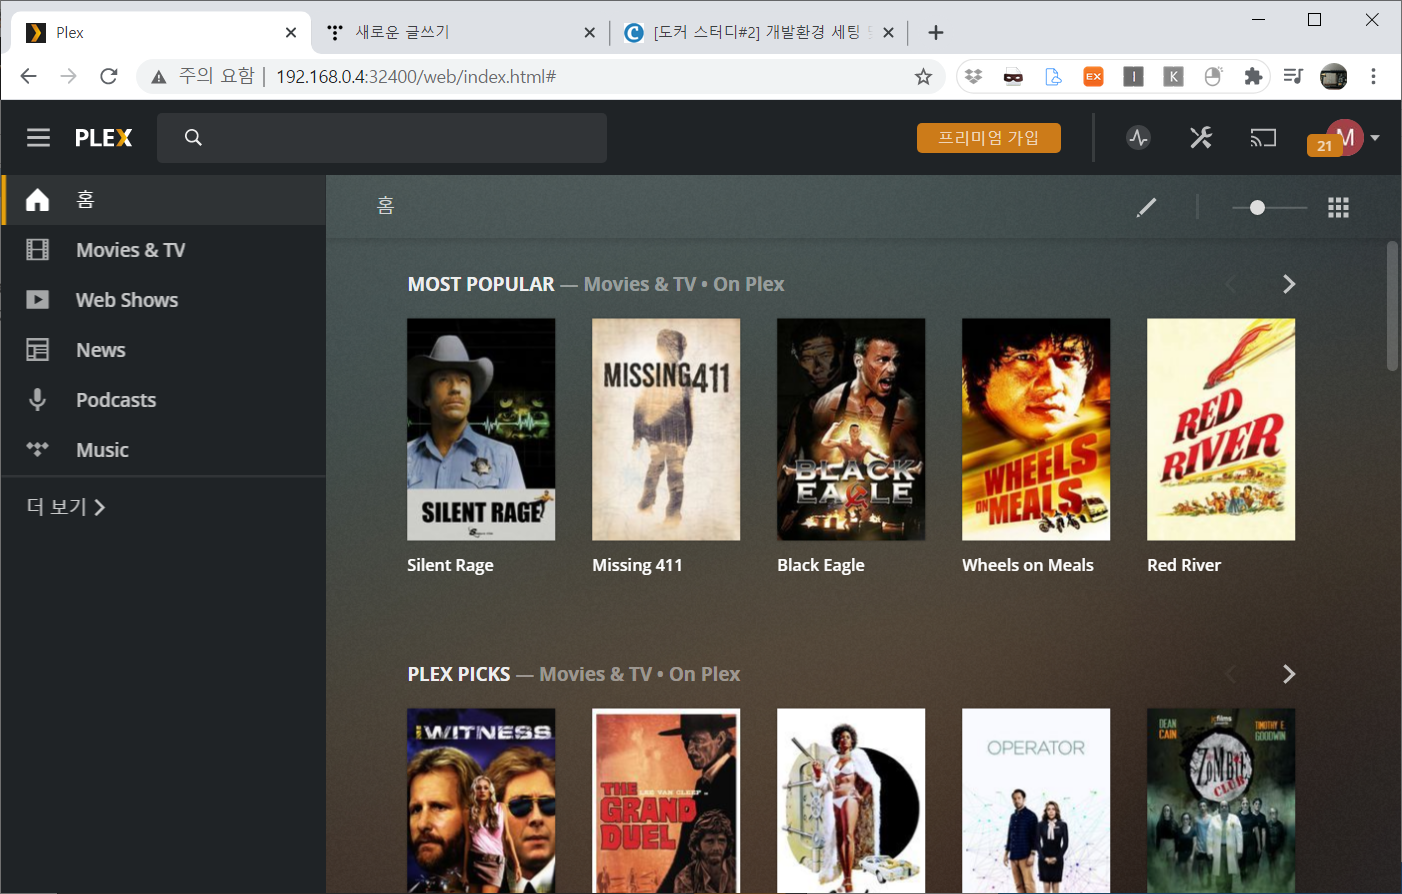
왼쪽 메뉴의 더보기를 선택하면, 조금전에 설정한 폴더(영화)가 표시된 것을 확인할 수 있다. 이 영화 폴더에 있는 동영상 파일이 오른쪽 화면에 표시된다.

오른쪽의 동영상을 선택하면 플레이를 할 수 있다. 물론, 휴대폰으로 PLEX앱을 이용하여 접속해도 동일하게 스트리밍 동영상을 플레이할 수 있다.
다음에는 트랜스미션과 메세징 서버(텔레그램)을 이용하여 휴대폰으로 다운로드 받을 토렌트 파일을 선택하면, 트랜스미션이 다운로드를 받도록 하거나, 정기적으로 설정한(시리즈 동영상 등) 동영상을 자동으로 내려받도록 해보려 한다.
다음에 짬 날때... ^^
'라즈베리파이 > 토렌트 미디어 서버 만들기' 카테고리의 다른 글
| 우분투에서 공유기의 NAS연결하기 (0) | 2024.12.01 |
|---|---|
| (5) TV로 미디어를 출력하기 위한, 간단한 minidlna 설정 (0) | 2024.07.20 |
| (3) 드라마/영화 등 자동으로 다운로드하는 NAS서버 만들기 #3 트랜스미션 설치 (0) | 2019.05.26 |
| (2) 드라마/영화 등 자동으로 다운로드하는 NAS서버 만들기 (0) | 2019.05.26 |
| (1)드라마/영화 등 자동으로 다운로드 하는 NAS서버 만들기- 환경 (0) | 2019.05.26 |